Lesson 4 is here
Lesson 5 is below:
Facebook
To begin with, you will need to create your account. I will walk you through how to do this on a desktop computer, but please bear in mind that the layout may change as Facebook updates its image, which may also be different on the mobile app.
First, go to Facebook’s login page and click ‘Create New Account’.
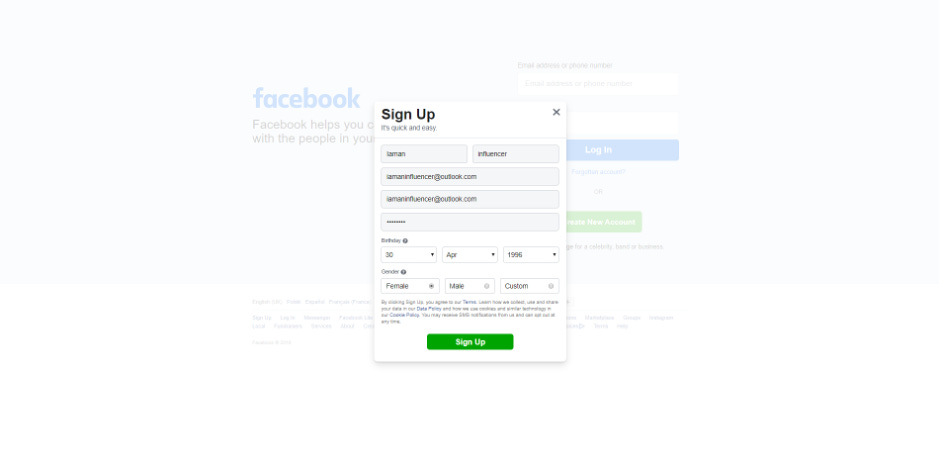
Next, you will see a small pop-up on the screen asking you to enter some basic information regarding yourself. For the purposes of this guide, I will be setting up an account for a pretend identity we’ll call Ms. Iaman Influencer.
Iaman Influencer already has an email that she can access in order to link to her new social media profiles. She also has a password ready and entered. The next step is to sign up, and you will then be directed to the next screen requesting that you fill in a code.
This code will have been sent to the email that you entered when signing up, so it is very important that you can access it to verify your account. Below is the next screen requesting the code, and the email from Facebook to Ms. Influencer.
Ms. Influencer enters the code she finds in her email into Facebook, but she could also have clicked on the button in the email to ‘Confirm Your Account’ with Facebook.
The next screen will take you to your new Facebook account, which is up to you to begin personalizing. I’ll cover how to manage your new Facebook profile for marketing and influencing your audience later.
Twitter (X)
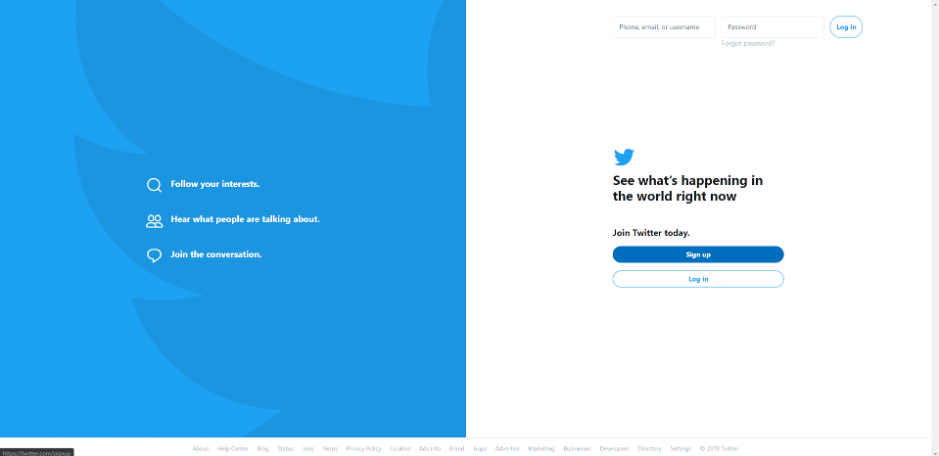
Ms. Influencer is also going to set up a Twitter account. Like Facebook, you will need to click ‘sign up’ on the login screen, which you can see below.
You will be taken to the next screen, as shown below, where you will be asked to enter your name, and either your email or phone number. I will be using Ms. Influencer’s email.
You will then be asked about your preferences before you can finish signing up. After choosing your preferences, you’ll be asked to reconfirm your name and email/phone.
Having confirmed your details, the next screen you’ll be taken to will ask you for a code, much like Facebook’s sign up process. I’ve entered the details from Iaman Influencer’s email into Twitter below:
Finally, you’ll need to confirm a password of at least six characters.
Your account is now complete! You will be asked if you want to choose a profile picture and enter a description of yourself, but you can press ‘Skip For Now’ if you are uncertain about how you want to present yourself (or your business) at this stage. Below is the screen of your new empty Twitter profile.
Pinterest
If you have signed up with Facebook already, then signing up to Pinterest is easy because you can link your two accounts. To do so, you’ll need to click the ‘Continue with Facebook’ button on the login screen, which will direct you to a pop-up screen asking you to log in to your Facebook profile. Once you’ve done this, the set-up will be complete.
Connecting your social accounts to a Facebook profile can be an advantage later if you want to schedule posts through a tool like Hootsuite, which may require you to have some of your profiles already linked to a Facebook account.
Alternatively, you can sign up without connecting your Pinterest to your Facebook by using your email, age and a password.
It’s as simple as that!
Instagram
As aforementioned in the Pinterest set-up section, signing up with your Facebook profile can make things easier in the long run – and Instagram is another platform where this is possible.
If you decide to log in with Facebook, you will be redirected to Facebook’s site where you can confirm your setting and agree to link the two together. Alternatively, we’ll show you how to sign up more traditionally:
After you press next on the screen above, you will be asked to confirm your age, and then you’re ready to start your Instagram journey.


